Elimination Diet – Friendly Tarts

Elimination Diet Friendly Tart 2This recipe is one that I created in an attempt to make a tart that was gluten – free, dairy – free, egg – free, and ultimately free of sugar (I did add some natural sugars though). These tarts are a nice little treat for you sweet-tooths out there who might need a sweet fix during an elimination diet or restricted diet.

Ingredients:

  • 2 cups of berries (ideally blueberries, raspberries, and/or blackberries)
  • 3 tablespoons of honey (may need to add more if the mixture is too “tart”)
  • 1 cup of brown rice flour
  • 1 cup of water
  • 2 cups of pitted dates
  • 1 cup of brazil nuts
  • 1 cup of walnuts

Directions:

Filling

  1. Combine 2 cups of berries and 3 tablespoons of honey in a non-stick frying pan and heat until well combined.
  2. Add in flour, followed by slowly adding in the water.
  3. Heat until thick consistency is reached.

Tart Base

  1. Combine dates, brazil nuts, and walnuts in a food processor and mix until thoroughly combined.
  2. Shape the mixture into tart shapes, making sure to leave the center indented for the filling.
  3. Place the filling in the center of the tart base.
  4. Place the tarts in the freezer until approximately 30-60 minutes prior to serving.

Have you benefitted from reading this blog? Know someone that would benefit as well? Share, Like, Comment, or Tweet this article, and let me know what you think.

Some of the information provided above may not be appropriate for everyone, please consult with your doctor before trying any of the above. If you are interested in Naturopathic Medicine and wanting a different approach to your health care needs, please book an appointment with Elisha Cook at the RSNC (416-498-9763) today and let me help you achieve your health goals.


Fasting Essentials

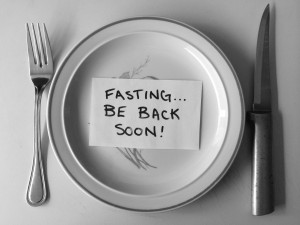
Fasting black and whiteA fast is defined as the following by the medical dictionary: “is voluntarily not eating food for varying lengths of time.” It is used as a medical therapy and/or a spiritual practice. As some of you may know, my husband and I recently completed a 40 day fast, where we only ate 1 meal per day. This fast was the first one for which we embarked on such a task, and as a result, we learned much from it. It is my hope that this blog will help provide you with some resources and information to help you if you ever choose to complete a fast (of various types) yourself.

Plan  

A fast is not something to be taken lightly. It takes not only a physical toll, but a mental one as well. As a result, it is beneficial to plan before completing a fast of any kind. For example, when we completed our fast we were deciding whether we should eat one meal per day or fast meat for the duration. Because there were various holidays involved and social gatherings that we could not control, we chose to eat the one meal per day (after considerable thought and prayer) in order to prevent other’s plans from being interrupted by ours.

Be Prepared 

In addition to planning, it is important to be prepared. Specifically, temptations will arise to have what you are fasting, e.g. chocolate cravings if you are fasting chocolate. Having strategies in place before the fast such as making snacks less accessible by removing them from your home or from plain sight can help your fast be more successful.

Seek Medical Advice

It is important that you seek medical advice before fasting, especially if you have any medical conditions such as high or low blood pressure and diabetes. These medical conditions can be impacted by the lack of food or fluid in your diet, and so, speaking with your health care provider, or a naturopathic doctor, can help you plan what the best approach to your fast will be, in order to avoid serious complications.

Stay Hydrated

With any fast, it is important to stay hydrated. Your body is going through a detoxification process spiritually and physically, and water can help your body flush out any toxins. In addition, fasting can decrease the fluid you are consuming, and so, this could cause your blood pressure to go down, leading to dizziness. By ensuring you are having adequate water intake, you will be less likely to have these symptoms. For my fast, I used coconut water to help curb any blood sugar drops, and to give variety with hydration. In addition, it is beneficial to avoid excess consumption of caffeine or alcohol as these drinks tend to dehydrate the body, and put the body into a greater hydration deficit.

Inform Those Around You

When you are fasting, temptation is not only internal, but external as well. By informing your family and friends of what you are doing, it can help your fast be more successful through their support, and help decrease the temptation from their actions. For example, if you are avoiding chocolate, and your partner does not know this, they may offer you some chocolate or eat it in front of you, causing you to feel tempted to discontinue the fast.

Have you benefitted from reading this blog? Know someone that would benefit as well? Share, Like, Comment, or Tweet this article, and let me know what you think.

Some of the information provided above may not be appropriate for everyone, please consult with your doctor before trying any of the above. If you are interested in Naturopathic Medicine and wanting a different approach to your health care needs, please book an appointment with Elisha Cook at the RSNC (416-498-9763), and let me help you achieve your health goals.

Tactics to Protect Yourself and Others from Colds and Flus

According to the FluWatch department in the Public Health Agency, influenza (flu) reports have increased this week. As a result, I wanted to provide you my viewers and readers with two videos that demonstrate how to properly wash your hands, as well as cover your mouth when you are sneezing. These videos may seem unnecessary, but many colds and flus could be prevented by taking into consideration how to effectively wash your hands and the most effective way to cover your mouth while coughing or sneezing. If you are sick and need medical care, please do go see your health care provider for more information, or book an appointment with me, Elisha Cook, and let me help you boost your immune system, fight off that cold, and prevent it!

Have you benefitted from reading this blog? Know someone that would benefit as well? Share, Like, Comment, or Tweet this article, and let me know what you think.

Some of the information provided above may not be appropriate for everyone, please consult with your doctor before trying any of the above. If you are interested in Naturopathic Medicine and wanting a different approach to your health care needs, please book an appointment with Elisha Cook at the RSNC (416-498-9763), and let me help you achieve your health goals.

Home – Made Roller For Muscle Pain

home - made rollerAs most of you may know, I am one of those people that likes to be creative. What I mean by this is, if I can make it at home, why go buy it from the store. As a result, when it was recommended for me to use a roller for neck tension, I sought out another means to accomplish the task without having to purchase an expensive roller. I was able to make one at home using only a couple of materials, and have found that I have received benefit from my make-shift roller. But before I give you the instructions on how to make one from scratch, here is some back ground information on “Rollers”.

Background

Foam rolling is a form of “soft – tissue” or “myo-fasical” release. In short, it helps your muscles to relax. In some individuals who experience chronic pain, one of the sources of that pain can be due to tight muscles. Rollers can provide a way for muscles to relax (and thus reduce pain), and also is beneficial for:

  • Breaking up adhesions
  • Delaying onset of muscle soreness
  • Quicker post – workout recovery
  • Increased flexibility and range of motion
  • Improve arterial functioning
  • Decrease pain

If your health care provider has recommended a roller for you, you might also be able to make one at home (as these can sometimes be quite costly). As a result, the following presents how to make a roller at home.

Materials Needed

  • 1 sock – preferably longer than an ankle sock and free of holes.
  • 2 tennis balls of equal size

Instructions

  • Take the two tennis balls and place them in the sock so that they are side-by-side.
  • Tie a knot at the end of the sock that is open so the tennis balls stay in the sock.
  • Make sure that the balls cannot move around in the sock easily.

And that’s it! Based on your particular case, this may be enough or not enough to achieve the benefits of a roller. Therefore, you should discuss with your health care provider if this approach is enough to achieve the benefits of a roller.

Have you benefitted from reading this blog? Know someone that would benefit as well? Share, Like, Comment, or Tweet this article, and let me know what you think.

Some of the information provided above may not be appropriate for everyone, please consult with your doctor before trying any of the above. If you are interested in Naturopathic Medicine and wanting a different approach to your health care needs, please book an appointment with Elisha Cook at the RSNC (416-498-9763), and let me help you achieve your health goals.